The TeensyWiNo shield does not embed an integrated antenna: connecting an antenna to the TeensyWiNo shield is mandatory. Always connect the antenna before powering the TeensyWiNo. Using a TeensyWiNo without antenna can destroy the hardware.
There are 3 antenna options:
- connecting a SMA antenna via the 18cm UFL pigtail in the kit,
- soldering a 1/4 wavelength wire (17.3cm for the 433MHz band) to the TeensyWiNo shield,
- soldering a DIY spring antenna
SMA antenna
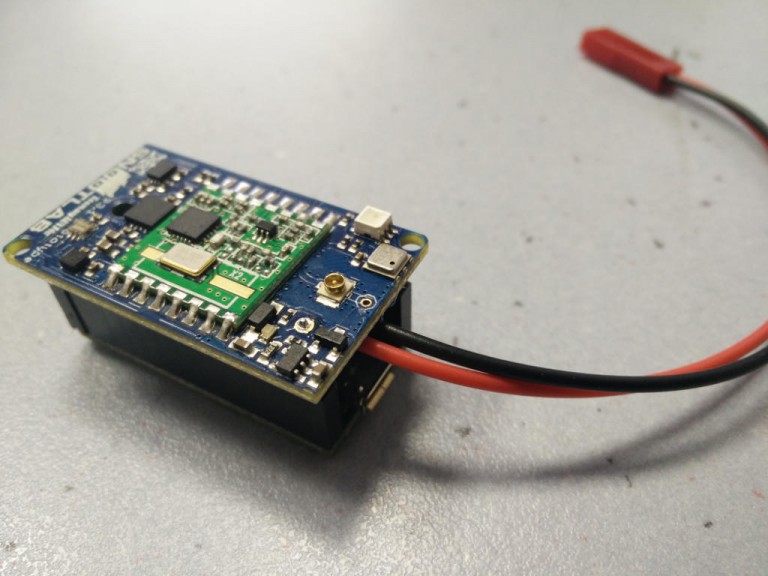
The TeensyWiNo kit may contains an antenna with SMA connector and an UFL pigtail. Plug the UFL pigtail on the TeensyWiNo shield and the SMA antenna to the pigtail.
Don’t forget that the uFL connector is fragile, it only allows a few dozen plug/unplug cycles.
TeensyWiNo With No Antenna
1/4 wavelength wire
Prepare a 1/4 wavelength wire and solder it on the TeensyWiNo shield. The wavelength wl depends on the radio frequency f:
wl = 3.10⁸/f
For the regular 433MHz radio band, the 1/4 wavelength is 17.3cm.

TeensyWiNo UFL-SMA Pigtail and SMA Antenna
DIY spring antenna
It is also possible to make a very powerful spring antenna for less than $1. And as you can see on the photo, the “spring” form factor is quite interesting 🙂
The spring characteristics are:
- Wire: single strand
- Length: 27cm
- Diameter: 9mm
- Number of turns: 7
Then solder the end of the wire to the TeensyWiNo shield, on the metallic hole. Leave the UFL connector unpluged.
The radio range is quite the same than with the SMA antenna.
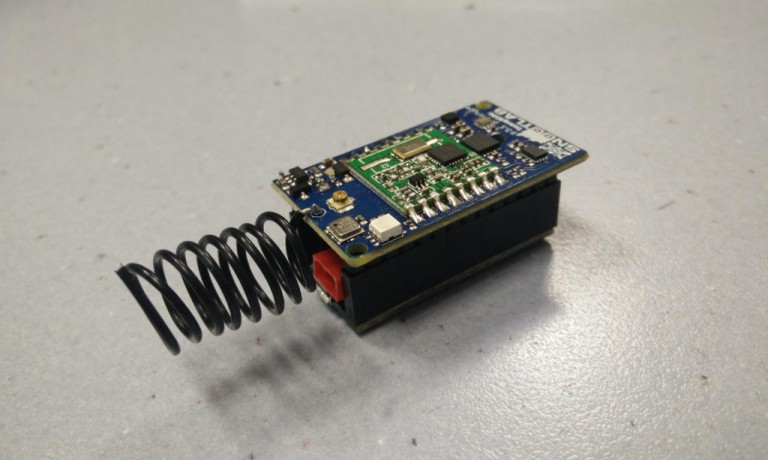
TeensyWiNo with DIY Spring Antenna